
How to assign hidden fee
Hidden fees in Xada allow you to quietly factor additional costs into your product pricing without exposing them as a separate line item on the storefront. This is commonly used for supplier surcharges, handling fees or internal cost adjustments that should be amortised into the website unit price.
This article explains what a hidden fee is used for, how it affects pricing and how to create and assign a hidden fee using custom fields and rules.
What Is a Hidden Fee Used For?
A hidden fee is stored as a custom field against a product and is used to amortise an additional cost into the final website unit price.
Common use cases include:
- Supplier handling or admin fees
- Freight or logistics costs that vary by supplier
- Cost recovery charges you do not want displayed to customers
- Internal margin adjustments
The hidden fee value is not shown on the storefront. Instead, it is used during pricing calculations so the final unit price reflects the true cost of the product.
How Hidden Fees Affect Website Pricing
When a hidden fee is applied:
- The fee value is amortised into the product unit price
- Customers only see the final website price
- No separate surcharge or fee is displayed
- Pricing remains clean and consistent across the storefront
This approach ensures customers see simple pricing while internal costs are still recovered.
Create the Hidden Fee Custom Field
Before assigning a hidden fee, you must first create a custom field to store the value.
- Click Custom Fields in the left-hand navigation.
- Click Create Custom Field and enter the following details:
- Name: Hidden Fee
- Type: Plain Text
- Active: Enabled
- Click Create to save the custom field.
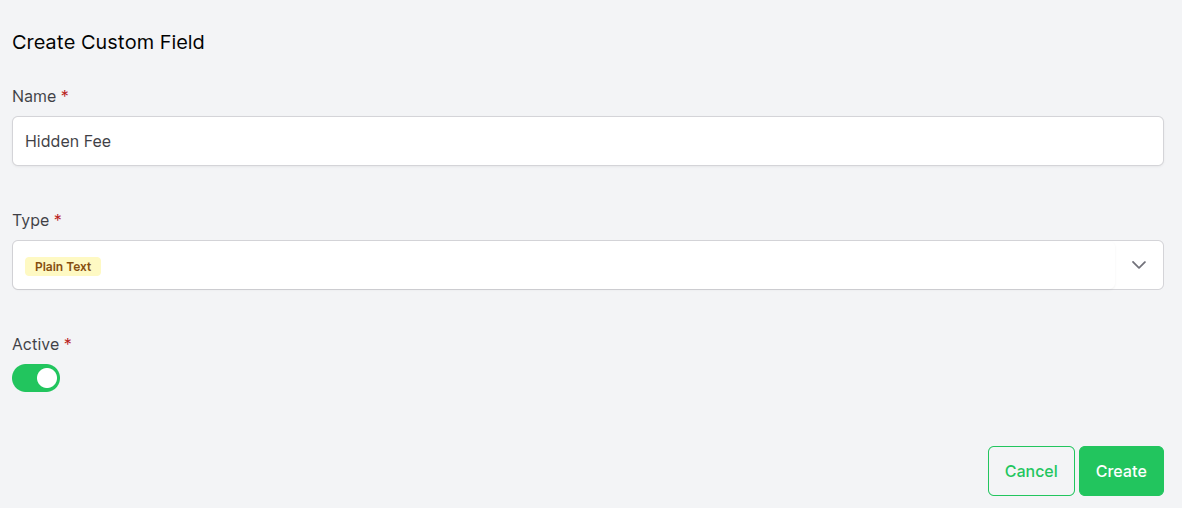
Once created, this field becomes available for use in rules.
Assign a Hidden Fee Using Rules
After the custom field is created, you can use a rule to automatically assign a hidden fee value based on conditions.
Step 1: Open Rules
Click Rules in the left-hand navigation.
Step 2: Create a New Rule
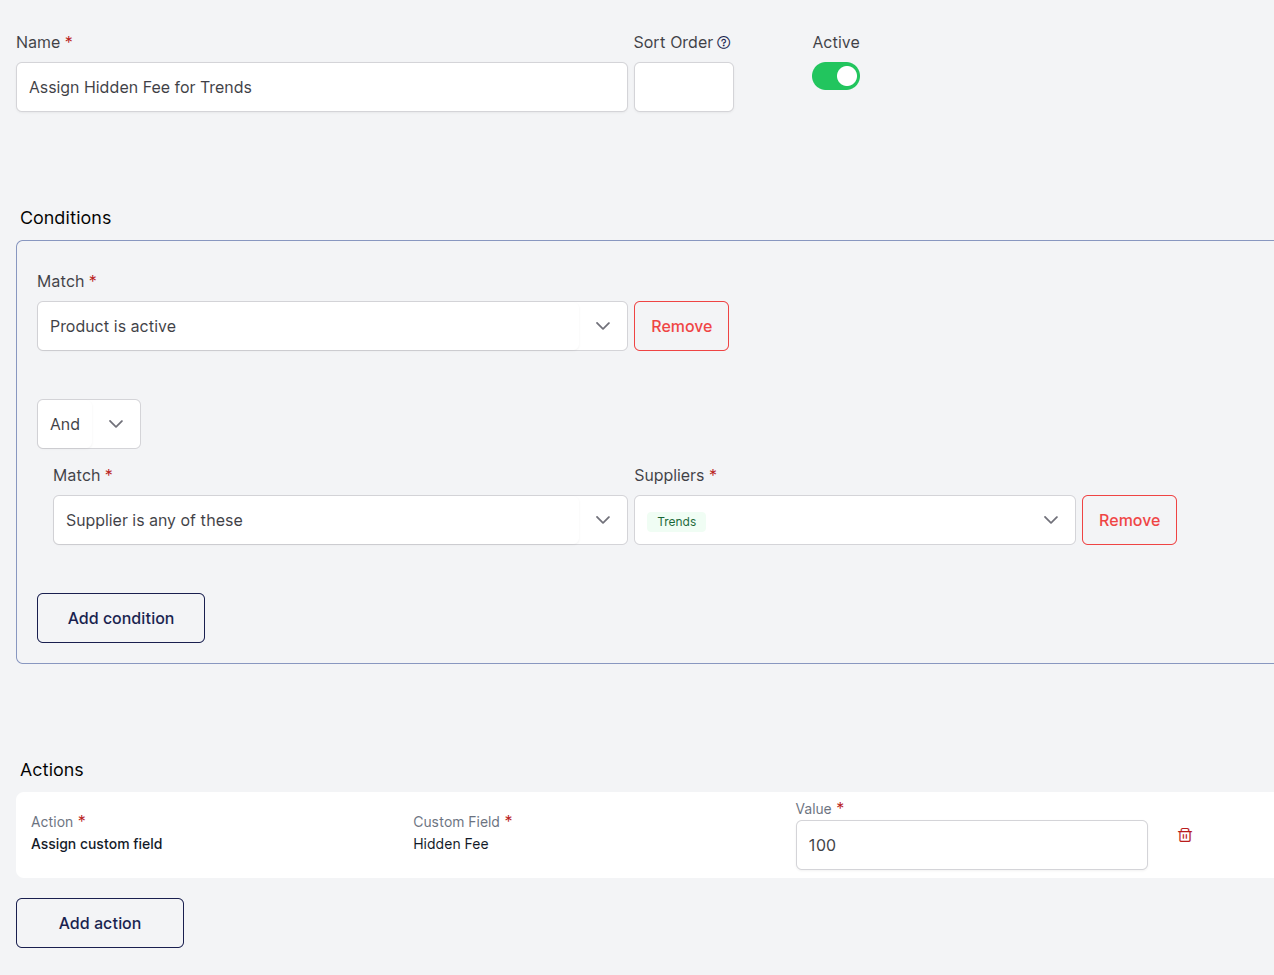
Click Create New Rule and enter a clear rule name.
Example: Assign Hidden Fee for Trends
Leave the rule inactive initially if you want to confirm matched products before applying changes.
Step 3: Configure Rule Conditions
Conditions determine which products receive the hidden fee.
A common setup includes:
- Product is active
- Supplier is any of these
Example condition setup:
-
Product is active
AND
- Supplier is any of these = Trends
This ensures only active products from the selected supplier are affected.
Step 4: Add the Hidden Fee Action
Add an action with the following settings:
- Action: Assign custom field
- Custom Field: Hidden Fee
- Value: 100
This value represents the fee amount that will be amortised into the product’s website unit price.
Step 5: Review Matched Products
After creating the rule, review the Matched Products section beneath the rule.
If no products appear:
- Review your conditions
- Check supplier selection
- Confirm products are active
Step 6: Activate the Rule
Once you are confident the correct products are selected:
- Enable the Active toggle
- Save the rule
The hidden fee will be applied the next time the rule runs.